Friday, September 22, 2017

Import MP4 to Lightworks

As a professional non-linear editing system, Lightworks can import a wide range of file types. However, a lot of people complain that they fail to import and edit MP4 video with Lightworks just as the condition listed below:

"I am trying to edit an MP4 video file. The Frame Rate is 29.97 I realize I need to convert this to edit in Lightworks. I installed EyeFrame Converter, but the selection of conversion choices is a bit daunting. The default (LW FREE MJPEG HD + Embed TC & RN - Proxy Quarter Size) doesn't work. What's the basic idea in using this tool to import MP4's into Lightworks? I am trying to edit MP4's that are bound for Powerpoint presentations."

Why Lightworks not import MP4 video?

After searching for Lightworks supported file formats, we can see that only the following file formats or codec can be loaded into Lightworks with no problem.

- DVCAM / DVCPRO 25, DVCPRO 50, DVCPRO HD
- Uncompressed SD 8 bit and 10 bit, Uncompressed HD 8 bit and 10 bit
- MPEG-2 I-Frame SD, MPEG-2 I-Frame HD, MPEG-2 Long GOP
- IMX 30, 40, 50
- AVCHD (M2T, M2TS, MPEG4, H.264)
- Avid DNxHD - all variants, including Thin Raster**
- AVC-Intra 50, AVC-Intra 100
- XDCAM EX (native MP4 support), XDCAM HD, XDCAM HD 50 422
- Apple Pro Res
- RED R3D
- DPX 8 bit, 10 bit, 16 bit
-Image Sequence (BMP, DPX, JPEG, PNG, TGA, Compressed TGA, TIFF)
- Broadcast Wave Format with drop and non-drop frame timecode options
- Cinema DNG

What's more, the compatible editing frame for Lightworks is 23.976, true 24, 25, 29.97, 30, 50, or 60 fps.

Convert MP4 for Lightworks smooth editing
If you are looking for a powerful yet simple to use application to get the job easily completed, we highly recommend you to download our best MP4 Converter - Pavtube Video Converter is highly recommended to you. The program has full support for all MP4 files encoded with various different video codec (H.265/HEVC) or audio codec (DTS and FLAC included) to Lightworks Pro editable file formats listed above. Besides that, you can adjust the output file frame rate or other profile settings to make them adapt with Lightworks.

For Mac users, please download Pavtube Video Converter for Mac to fix MP4 Lightworks editing issue on Mac OS X El Capitan or macOS Sierra.

How to Convert MP4 for Lightworks Editing?

Step 1: Load MP4 files into the program.

Install and launch the MP4 video converter program on your computer, click "File" > "Add Video/Audio" or "Add from Folder" to load unsupported MP4 files into the program.

Load MP4 files into the application

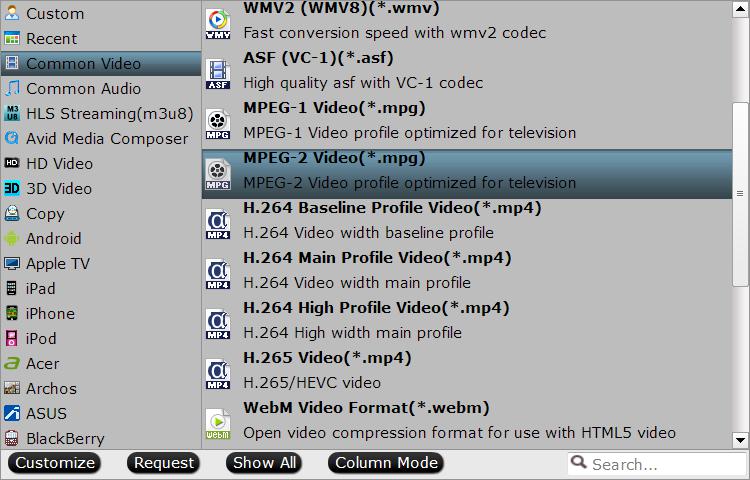
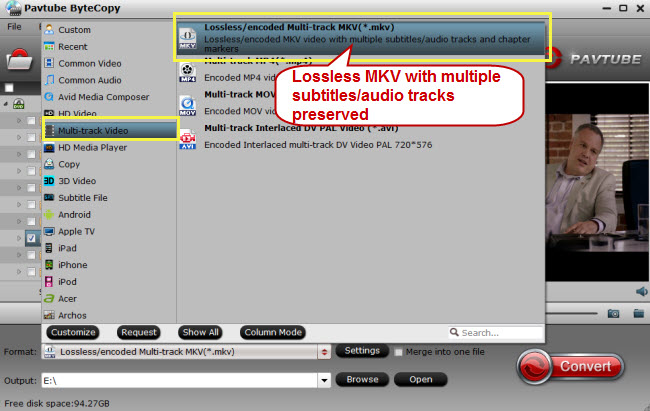
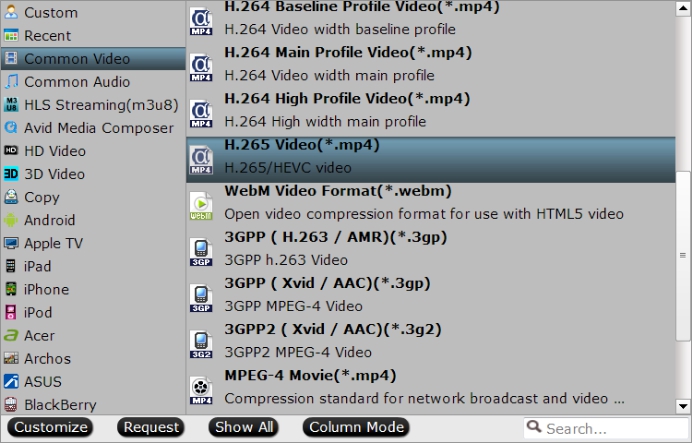
Step 2: Choose output file format.

Click "Format", from its drop-down option, choose one of Lightworks supported "H.264 HD Video(*.mp4)" under "HD Video" main category.

Output Lightworks supported file formats

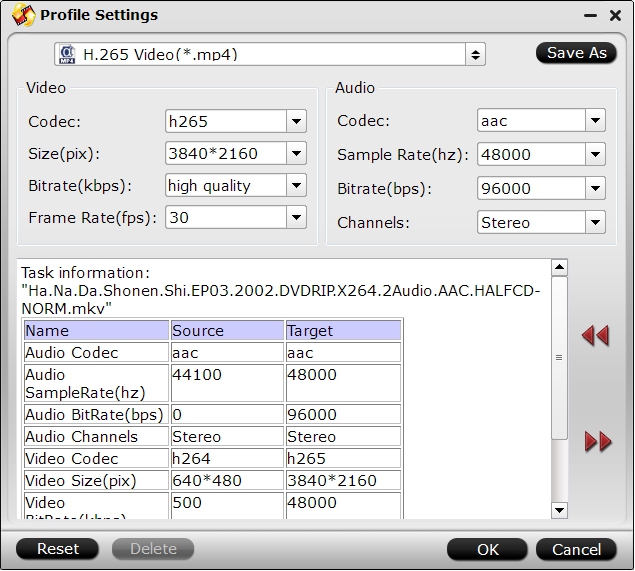
Step 3: Adjust output profile parameters.

Click "Settings" to open "Profile Settings" window, here you can flexibly adjust the frame rate and other profile settings such as video codec, bit rate, frame rate, resolution and audio codec, bit rate, sample rate and channels, etc to make them adapt with Lightworks.

Adjust output profile parameters

Step 4: Begin MP4 to Lightworks conversion process.

After all settings is completed, hit right-bottom "Convert" button to begin the conversion from MP4 to Lightworks conversion process.

When the conversion is completed, you can click "Open Output Folder" button to get the output files effortlessly, and now you will have no problem to import and edit MP4 files with Lightworks.

Friday, September 15, 2017

Copy/Backup Blu-ray to Synology DS1517+

Equipped with dual-channel memory and a PCIe slot, the Synology DS1517+ supports installing the dual M.2 SSD adapter card, M2D17, or the 10GbE NIC, for high-IOPS system cache and ultra-fast data transmission respectively. Have a lot of movies on Blu-ray disc and wish to digitize them for better storage. The Synology DS1517+ can be your best choice. Have no idea how to copy or backup Blu-ray movies to Synology DS1517+, just read on...

Best solution to make a Blu-ray to Synology DS1517+ copy or backup

Remove protection from Blu-ray movies

To copy or backup Blu-ray movies to Synology DS1517+, you will first need to make a digital copy from the Blu-ray movies. Due to the complicated encryption used on Blu-ray disc, you will need a specific application to bypass the protection. The good news is that here comes Pavtube ByteCopy, which can assist you to powerfully and automatically bypass all Blu-ray copy protection and region code in the background, so that you can then freely copy the movies on Blu-ray disc without any limitation. Besides that, the program also keeps constant update with perfect support for the new disc encryption such as MKB61 and MKB62 used on many recently released Blu-ray disc.

Copy or backup Blu-ray to Synology in different ways

The biggest merits of this program is that you can perform the Blu-ray disc copy protection removing and Blu-ray to digital format copying and ripping process on the same interface. To satisfy your different needs, the program offers various different disc copying or ripping mode. You can make a 1:1 full disc copy of Blu-ray movies of original Blu-ray structure with all the subtitle languages, audio tracks and chapter information well preserved, a fast main movie copy without unwanted comments, ads or trailers or a lossless multi-track MKV copy with all your unwanted subtitle languages, audio tracks. As for ripping Blu-ray, you can either choose to convert Blu-ray to popular digital file formats or hot devices and applications preset profile formats.

For Mac users, you can download Pavtube ByteCopy for Mac to perform the copying or backing process on macOS High Sierra, macOS Sierra, Mac OS X El Capitan, Mac OS X Yosemite, etc.

Step by Step to Copy or Backup Blu-ray Movies to Synology DS1517+

Step 1: Load Blu-ray movies into the application.

Download, install and run this Blu-ray ripper and copy software. Insert the Blu-ray disc into your computer's Blu-ray drive. If your computer doesn't ship with a drive, you will need to purchase an external USB Blu-ray drive to read on the data on Blu-ray disc. Then press "File" > "Load from disc" option on the main interface, alternatively, you can also import Blu-ray folder or Blu-ray ISO files with the program.

Load Blu-ray disc

Step 2: Backup Blu-ray movies to Synology DS1517+ in different ways.

Full disc copy

On the top tool bar of the main interface, use the  option to make an entire disc copy of original DVD structure without changing anything.

Main Blu-ray movie copy

From "Format" bar drop-down list, select "Copy" > "Direct" Copy, you can then copy the selected movie file in its original format without quality loss. When directly copy a Blu-ray video, you will get .m2ts as output.

Main Blu-ray movie copy

Lossless multi-track MKV copy

To preserve all your wanted audio tracks and subtitles streams in the source movie, you can use the program to rip Blu-ray to " Lossless/encoded multi-track MKV(*.mkv)" under "Multi-track Video" category.

Blu-ray to lossless multi-track MKV copy

Blu-ray to digital movie format copy

Here, select the output digital file format according to which devices you plan to stream the Blu-ray movies from Synology DS1517+ to. Here, we choose one of the best compatible digital file formats "H.264 HD Video(*mp4)" under "HD Video" main category.

Backup Blu-ray to digital file format

Step 3: Start Blu-ray to Synology DS1517+ backup process.

After all setting is completed, hit the "Convert" button at the right bottom of the main interface to begin Blu-ray to Synology DS1517+ copying or ripping process.

When the conversion is finished, click "Open Output Folder" icon on the main interface to open the folder with generated files. Then you will produce a digital file for either safe backup or convenient device streaming from Synology DS1517+.

Friday, September 8, 2017

Backup DVD to Synology DS1517+

Synology DiskStation DS1517+ is a 5-bay NAS powered by a quad-core CPU with AES-NI hardware encryption engine. Equipped with dual-channel memory and a PCIe slot, DS1517+ supports installing the dual M.2 SSD adapter card, M2D17, or the 10GbE NIC, for high-IOPS system cache and ultra-fast data transmission respectively. For those people who are looking for a safe way to store your large collection of DVD movies, Synology DS1517+ can be your best choice. The following article will show you different ways to copy or backup DVD movie to Synology DS1517+.

Copy or backup DVD movies to Synology DS1517+

Bypass protection from DVD movies

As a network storage devices, the Synology DS1517+ has no specific requirements for the file formats storing on it. However, it would be a great hassle for you to copy DVD movies to Synology DS1517+ due to the complicated protection used on the DVD disc. You will need a specific program to bypass that protection. Here, you can get the job easily done with our powerful DVD Ripping application - Pavtube ByteCopy, which can automatically bypass the DVD copy protection and region code in the background with its built-in disc decrypter, you can then make a digital copy of the movies on DVD disc without any limitation.

Backup DVD movies to Synology DS1517+ in different ways

Besides breaking protection from DVD movies, you can also use the program to backup DVD movies to Synology DS1517+ in different ways: if you wish to keep the original structure of your DVD movies, you can make a 1:1 full disc copy of DVD movies with all the subtitle languages, audio tracks and chapter information. If you care much about conversion time, you can perform a main DVD movie copy without unwanted trailers, ads, comments, etc. For those people who wish to backup DVD to digital file formats with all your unwanted subtitle languages, audio tracks, you can select to backup DVD to lossless multi-track MKV format. What's more, you can also choose to convert DVD to popular digital file formats or device preset profile formats according to your own needs.

For Mac users, you can download Pavtube ByteCopy for Mac to perform the copying or backing process on macOS High Sierra, macOS Sierra, Mac OS X El Capitan, Mac OS X Yosemite, etc.

Step by Step to Copy or Backup DVD Movies to Synology DS1517+

Step 1: Load DVD movies into the application.

Download, install and run this DVD ripper. You can load DVD by clicking "File" > "Load from disc". Or load DVD Folder by clicking "File" > "Load from folder" or load DVD IFO/ISO image by clicking "File" > "Load IFO/ISO"

Load DVD movies

Step 2: Backup DVD movies to Synology DS1517+ in different ways.

Full disc copy

On the top tool bar of the main interface, use the  option to make an entire disc copy of original DVD structure without changing anything.

Main DVD movie copy

From "Format" bar drop-down list, select "Copy" > "Direct" Copy, you can then copy the selected movie file in its original format without quality loss. When directly copy a DVD video, you will get .VOB as output.

DVD main title copy

Lossless multi-track MKV copy

To preserve all your wanted audio tracks and subtitles streams in the source movie, you can use the program to rip DVD to " Lossless/encoded multi-track MKV(*.mkv)" under "Multi-track Video" category.

DVD to lossless multi-track MKV copy

Convert DVD to streaming devices compatible formats

Here, select the output digital file format according to which devices you plan to stream the DVD movies from Synology DS1517+ to. Here, we choose one of the best compatible digital file formats "H.264 HD Video(*mp4)" under "HD Video" main category.

Convert DVD to device compatible file formats

Step 3: Start DVD to Synology DS1517+ backup process.

After all setting is completed, hit the "Convert" button at the right bottom of the main interface to begin DVD to Synology DS1517+ copying or ripping process.

When the conversion is finished, click "Open Output Folder" icon on the main interface to open the folder with generated files. Then you will produce a digital file for either safe backup or convenient device streaming from Synology DS1517+.

Wednesday, August 30, 2017

Two Ways to Play MP4 on DVD Player

Have some MP4 videos on your local computer hard drive and wish to play them on your home DVD players. The following article will share you 2 effective solution to get MP4 files played on DVD player with ease.

Method 1: Burn MP4 to DVD player

Although there are many free DVD burner software, however, many programs can only import very limited file formats, you may fail to load certain MP4 video into the program. Fortunately, here comes Pavtube DVD Creator, which has full support for all 4K/2K/HD/SD MP4 video encoded with various different compression codec such as MPEG-1, MPEG-2, MPEG-4, H.264, H.265, WMV/VC-1, etc. You can easily burn MP4 files to DVD disc by following the steps below:

Step 1: Insert a blank DVD disc into your computer optical drive.

Insert a blank DVD-R (DVD+R, DVD+RW, DVD-RW) into the DVD-ROM drive of your computer.

Inser blank DVD disc into the program

Step 2: Add MP4 videos.

Run the DVD Creator software, import MP4 video into it for burning DVD disc project.

Add MP4 video into the program

Step 3: Customize DVD menu.

Switch to the menu pane, double click a DVD menu beneath the Menu Template to apply it to your DVD. You can customize the background video/image, background music, text, title thumbnail and more for your DVD menu. You can also choose the DVD quality at the bottom of the software, higher quality requires bigger DVD disc volume.

Customize DVD menu

Step 4: Start MP4 video to DVD burning process.

Click the "Burn" button to start MP4 videos to DVD. You can also burn MP4 to ISO file or Generate to DVD Folder.

Start MP4 to DVD disc burning process

Method 2: Convert MP4 to DVD player compatible file format

Nowadays, more and more high-end DVD player models come with USB ports which allow you to play media from your digital collection without burning discs. But always make sure that the files store on USB drive or external hard drive are included in DVD player supported file formats. Usually, most DVD player can handle digital file formats with the format of DivX AVI, MPEG-2, MPEG-1.

Here, a powerful MP4 to DVD Player - Pavtube Video Converter Ultimate is highly recommended to you. With the program, you can batch convert multiple MP4 files encoded with different video and audio codec to DVD Player readable file formats listed above. To get better output video and audio quality, you can flexibly adjust the output profile parameters including video codec, resolution, bit rate, frame rate, audio codec, bit rate, sample rate, channels, etc as you like.

Besides MP4, you can also use the program to convert other file formats such as WMV, MOV, WMV, MPG, H.265, H.264, MXF, AVCHD, XAVC/XAVC S, etc for DVD player viewing with USB port.

For Mac users, please feel free to download Pavtube iMedia Converter for Mac to perform the same conversion on Mac OS X El Capitan and macOS Sierra.

Get Pavtube Video Converter Ultimate with 20% off discount, coupon codec: 45K2D47GJH

Step by Step to Convert MP4 for DVD Player Viewing from USB

Step 1: Import MP4 files into the program

Load MP4 files into the program

Step 2: Output DVD player supported MPEG-2 format.

Output DVD player supported file formats

Tips: Click "Settings" on the main interface to open "Profile Settings" window, here, you can flexibly choose or specify exactly the profile parameters including video codec, resolution, bit rate, frame rate, audio codec, bit rate, sample rate, channels, etc as you like to get better output video and audio quality.

Step 3: Begin the conversion process.

When the conversion is completed, following the steps below to transfer and play converted files on DVD player from USB port.

Step 1: Put your USB flash drive into a USB port on your computer.
Step 2: Open your USB flash drive by clicking on "My Computer" and then clicking on the icon for your flash drive.
Step 3: Drag the appropriately formatted video files into this window. They will now be transferred to your USB flash drive.
Step 4: Remove the USB flash drive from your computer.
Step 5: Put your USB flash drive into an open USB port on your DVD player.
Step 6: Use your DVD player's remote control to navigate to the "USB Flash Drive" menu. Select the file you want to play from the list by highlighting it and pressing the "Enter" or "Play" buttons on the remote. The file will now play on your TV screen.

Wednesday, August 23, 2017

Copy and Play DVD Movies on Blu-ray Player

Can Blu-ray player play DVD disc?

Today, many Blu-ray player manufacturers have also included the ability for their units to playback standard DVDs, this means that your current DVD library is playable on a Blu-ray Disc player. Also, when you play a standard DVD in a Blu-ray Disc player, you can view it at standard DVD resolution or have the player upscale the DVD playback signal to match 720p/1080i/1080p or even 4K mode(some Blu-ray Disc players provide 4K upscaling) that will be a better match for viewing on an HDTV or 4K Ultra HD TV.

Rip or Copy DVD movies for Blu-ray Player viewing

Sometimes, to keep your precious DVD disc from scratched or damaged due to frequent playback in Blu-ray player or conveniently playing your favorite DVD movies on Blu-ray player without rifling through your collection and swapping the discs, you will wish to copy or rip DVD disc into digital file formats for viewing on Blu-ray player.

To make digital copy from DVD movies, what you need is a DVD copy software. Here, you can easily get the job by download Pavtube DVDAid, which has full support for loading DVD disc, Video_TS folder and DVD IFO/ISO image file. The program can assist you to automatically bypass the DVD copy protection and region code in the background with the built-in disc decrypter, you can then make a free disc copy or ripping.

As for the output file format, you can make a full disc copy of DVD movies with all your unwanted menus, features, chapters, etc to save as a Video_TS folder or make a fast main movie copy in VOB file format to leave out the unwanted extras such as comments, trailers, ads, etc. You can also check your Blu-ray player's user manual to see what digital file formats can be played on it and then use our program to rip DVD to Blu-ray player compatible digital file formats.

For Mac users, please switch to download Pavtube DVDAid for Mac to perform the same conversion on macOS High Sierra, macOS Sierra, Mac OS X El Capitan, Mac OS X Yosemite, etc.

Get Pavtube DVDAid for Windows/Mac with 20% off discount, coupon codec: 45K2D47GJH

How to Copy or Rip DVD Movie for Blu-ray Player Viewing?

Step 1: Import DVD Movies.

Download, install and run this DVD ripper. You can load DVD by clicking "File" > "Load from disc". Or load DVD Folder by clicking "File" > "Load from folder" or load DVD IFO/ISO image by clicking "File" > "Load IFO/ISO".

Load DVD movies

Step 2: Copy or rip DVD movies.

Full disc copy

On the top tool bar of the main interface, use the  option to make an entire disc copy of original DVD structure without changing anything.

Main movie copy

From "Format" bar drop-down list, select "Copy" > "Direct" Copy, you can then copy the selected movie file in its original format without quality loss. When directly copy a DVD video, you will get .vob as output.

Main movie of DVD copy

Rip DVD to Blu-ray player supported digital formats

Choose to select one of your Blu-ray player listed on its user manual as the final output file format.

Output Blu-ray player supported digital file format

Tips: Click "Settings" on the main interface to open "Profile Settings" window, here, you can flexibly choose or specify exactly the profile parameters including video codec, resolution, bit rate, frame rate, audio codec, bit rate, sample rate, channels, etc as you like to get better output video and audio quality.

Step 3: Begin the copying or ripping process.

After all setting is completed, hit the "Convert" button at the right bottom of the main interface to begin DVD movie to Blu-ray player copying or ripping process.

When the conversion is finished, click "Open Output Folder" icon on the main interface to open the folder with generated files. Then you can conveniently view any of your favorite DVD movies on Blu-ray player with no damage to DVD disc.

Wednesday, August 16, 2017

Backup Blu-ray Movies to Synology DS216Play

The Synology DS216Play offers a maximum storage capacity of up to 16TB, you can store a large number of files that can be accessed and managed from nearly anywhere. For Blu-ray movie collections, it would be a good option for you to backup Blu-ray movies to Synology DS216Play, so that you can conveniently access the Blu-ray movies on Windows computer, Mac, iOS, Android and Windows Phone. The following article will show you how to backup or rip Blu-ray to DS216play for better usage.

Backup Blu-ray movies to Synology DS216Play

Although Synology DS216Play has no specific requirements on the file formats stored on it, however, as for commercial Blu-ray movies, it would be another story. The main reason is that the complicated copy protection and region code on Blu-ray disc makes it difficult for you to copy the content on Blu-ray movies to Synology DS216Play. The good news is that you can bypass that protection with a powerful Blu-ray Ripper application.

Best tool to copy Blu-ray movies to Synology DS216Play

Although there are many Blu-ray Ripper software can assist you to complete the job, however, if you are looking for a powerful program that can remove all Blu-ray copy protection and region code, we highly recommend Pavtube ByteCopy to you. Besides that, the program also keeps constant update with perfect support for the new MKB61 and MKB62 encryption used on many recently released Blu-ray disc, BDMV folder and Blu-ray ISO image file.

With the program, you can backup Blu-ray movies to DS216Play in the following 5 different ways:
- 1:1 full disc copy of Blu-ray to computer hard drive with all subtitle languages, audio tracks and chapter information well preserved.
- Directly Copy main movie from Blu-ray discs and leave out unwanted extras such as comments, trailers, ads, etc.
- Get a complete MKV file out of Blu-ray or DVD source and desired audio streams and subtitle tracks are preserved with almost same HD quality.
- Rip Blu-ray to popular digital HD file formats including H.264 HD MP4, H.264 HD MOV, H.265 HD, MPEG-4 HD MP4, MPEG-2 HD, MPEG-TS HD, MKV HD, WMV HD, Divx HD, AVI HD, BDAV HD, etc or SD file formats
- Output iPhone, iPad, Android phone or Windows Phone preset profile formats from Blu-ray movies.

Step by step to Copy/Backup Blu-ray Movies to Synology DS216play?

Step 1: Load Blu-ray disc.

Insert the Blu-ray disc into your computer's Blu-ray drive. If your computer doesn't ship with a drive, you will need to purchase an external USB Blu-ray drive to read on the data on Blu-ray disc. Then press "File" > "Load from disc" option on the main interface, alternatively, you can also import Blu-ray folder or Blu-ray ISO files with the program.

Load Blu-ray disc

Step 2: Backup Blu-ray/DVD to Synology DS216Play.

Full disc copy

Make a full disc copy by hitting the full disc copy icon on the top tool bar of the main interface.

Main movie copy

From "Format" bar, select "Copy" > "Direct Copy" to copy the main movie of the Blu-ray disc.

Direct Copy

Lossless Multi-track MKV copy
Get a complete MKV output from Blu-ray by following "Multi-track Video" > "Lossless/encoded Multi-track MKV(*.mkv)".

Lossless multi-track MKV copy

Step 3: Rip Blu-ray for Device streaming with DS216play.

Click "Format" bar to select "HD Video" > "H.264 HD Video(*.mp4)" which is the most compatible file format which works on iPhone, iPad, Apple TV, Android phone/tablets and Windows phone and tablets, etc.

Output popular digital file format

Step 4: Start the Blu-ray to Synology DS216play backup process.

Go back to the main interface, press right-bottom "Convert" button to start Blu-ray movie to DS216Play copy or digital format conversion process.

When the convesion is completed, you will have no limitation to stream your favorite Blu-ray movies and TV shows from Synology NAS DS216play to any supported devices as you like.

Friday, August 4, 2017

How to Stream 4K Video to Roku via Plex 

4K Ultra HD gives you a better viewing experience by increasing the pixel resolution – it’s four times that of HD! Nowadays, big-budget films (and an increasing number of TV series) are being filmed in 4K, and you can also record some 4K footage with 4K capable camera or camcoder. For 4K video lovers, you may wish to watch the 4K videos on Roku via Plex so that you can conveniently and remotely control the designed interface from your couch. However, although the Roku Ultra, Roku Premiere+, Roku Premiere and 4K Roku TV models all support streaming 4K up to 60 (fps to give you smooth and clear motion no matter how frantic the car chase or drawn-out the instant replay), the Roku only supports a limited number of local media files like MP4 (H.264) & MKV (H.264) video / AAC & MP3 audio / JPG & PNG image). It indicates that you may fail to stream some 4K videos to Roku via Plex, such as XAVC S, Prores, MXF,etc.

What media file types does the Roku Media Player channel support? 

Video — H.264/AVC (.MKV, .MP4, .MOV), on Roku 4 only: H.265/HEVC (.MKV, .MP4, .MOV); VP9 (.MKV)

Audio – AAC (.MKV, .MP4, .MOV); MP3(.MP3, .MKV); WMA (.ASF, .WMA, .MKV), FLAC (.FLAC, .MKV), PCM (.WAV, .MKV, .MP4, .MOV), AC3/EAC3 (.MKV,.MP4. .MOV, .AC3), DTS (.MKV, .MP4, .MOV), ALAC (.MKV, .MP4, .MOV, .M4A)

By installing Plex Media Server on your computer and then run the Plex channel on your Roku media player, you will also need to know what media formats are supported by Plex Media Server.

Stream incompatible 4K video to Roku via Plex

To stream any 4K video to Roku via Plex, the best solution is transcoding 4K video to the format and profile settings listed above. Pavtube Video Converter for Windows/Mac  can beneficially convert any 4K videos with various different container and codecs to Roku native compatible H.264 or H.265 codec with MP4 container. In addition, you are also given the chance to adjust output file resolution, frame rate, bit rate to get the optimal 4K streaming settings for Plex app on Roku.

What's worth mentioning here is that the program has upgraded with perfect support for H.265 encoding acceleration, you can transcode 4K videos to 4K H.265 with up to 30x faster speed on a PC computer with a Nvidia Graphic Cards that supports Nvidia NVENC technology.

Step by Step to convert 4K videos for Roku Playing from Plex

Step 1: Import 4K video files.

Download and install this program on your computer. Get it running, then on the top menu, click “File” > “Add Video/Audio” or “Add from folder” to import 4K video files to the program.

Import 4K video files

Step 2: Output Roku Plex app supported 4K format

From “Format” drop-down list, scroll down the main category list on the left, navigate to “Common Video”, from its extended list on the right, specify to output “H.264 Baseline Profile Video (*.mp4)”. If you are using Roku 4, "H.265 Video (*.mp4)” is suitable for you.

Output Plex app for Tivo Bolt supported 4K format

Step 3: Adjust output video codec, size, bit rate, etc.

Click “Settings” to open “Profile Settings” window, set the output video codec as H.264 or H.265, “Size(pix)” as “3840*2160″, frame rate as 30fps, video bit rate as 8kbps to get optimal 4K streaming settings for Plex app.

Adjust output profile settings

Step 4: Begin the conversion process.

After all setting is completed, hit right-bottom "Convert" button to begin the conversion from 4K videos to Roku playable 4K H.264 or 4K H.265 format encoding process.

When the conversion is done, open output folder, find the generated files and add converted files to plex app for streaming on Roku for free playback.

Source Article: How to Stream 4K Video to Roku via Plex